Pages

Showing posts with label Kitchen. Show all posts

February 9, 2012

The {Barn Door} Pantry

I would love a walk-in pantry. 

I would also love a master suite, a Porsche roadster, and a baby who doesn't bite me after a marathon nursing session. But, the reality is I have to walk across the hall to use the bathroom, I drive a ten-year old SUV, and my baby bit me today after a marathon nursing session (when will this terrible teething stop?). Oh, and I have a closet for a pantry. 

Here's the probleme-o: I really love to cook, I have an insane amount of kitchen gadgetry that I am not willing to part with, and our kitchen is small. I have to make the most out of every square inch of this small cottage. I needed a pantry. So when we started the kitchen renovation, we also turned our attention to this built-in in the hallway right outside the kitchen. 


This was the view of the built-in and the hallway when we first bought the cottage. That little door was a laundry chute that we removed a while ago. Don't you just love seeing all these old teal photos? This is a bonus photo: you also get to see the pink of the old kitchen on the right side of the photo!


This shows the built-in right before we tore the kitchen out (about three years after we bought the cottage). Normally I don't advocate tearing out built-ins as they add a ton of character and badly needed storage. But in this instance I needed to better utilize the space. This built-in was positioned right over the stairway and the wall is angled down - this will make more sense when you see the inside - so that bottom drawer wasn't as functional as it could have been. Plus there was unused space above the closet that was being wasted.

Tired of all the blah, blah, blah?  Me too. 

Here's the pantry now...


When a friend of mine told her husband that we were planning a barn door for our pantry, he responded with "What? Why?" I get it. It seems an odd choice. Here's why we did it. The pantry is located in the hallway between the kitchen, dining room and bedrooms so the hallway gets a ton of use and we didn't want a big swinging door blocking the traffic. Also, the barn door is awesome. Reason enough!

Now for the inside...


Like I said, the kitchen is small, so we opted to move the microwave out of the kitchen and into the pantry. Because we were re-wiring the entire kitchen and re-framing the "closet/pantry" it was easy to install an outlet at the right height to provide power. 


You can see at the bottom of the pantry how the wall is angled down. Instead of letting that space go to waste, we installed some shallow drawers at the bottom that would utilize the space. 


This pull-out is for all the larger 'small' appliances that I don't use everyday, but often enough that I don't want to store them in the basement storage. Bread machine, crock pot, rice maker, food processor, mini food processor. 


I couldn't have a walk-in pantry, so I devised a pull-out pantry. They pull all the way out, so I have full access to everything I have stored in the drawers. Now every square inch is used for storage. 


Just like in our master closet we used stock components from Ikea to make our pull-outs. For the top three we used the 36"x 24" 'deep' drawer component found in the kitchen section. They don't offer drawer fronts for drawers that wide so we made our own fronts out of MDF (medium density fiberboard). For the bottom two pull-outs we had limited space but the shallow drawers didn't come in 36" widths. We used two 18" x 12" drawers instead, and installed a divider between the drawers out of MDF. For the drawer fronts we used the Ikea ones and then placed some large white plastic bins (also from Ikea) in the pull-outs.

Now for the barn door hardware...


Long before we started this project, we started searching for the perfect hardware. We were not prepared for what we found. Barn door hardware is spendy! Like $400 and up! Yeah, not a splurge we were willing to make.

We happened to mention our predicament to a craftsman who was visiting us one weekend, and he said "Oh, I can make that." We gave him the dimensions and he designed and fabricated the whole thing for our Christmas gift! It really is a work of art. He is a true craftsman...he can make anything. I am proud to tell you that he is also my brother!


He devised these rubber stoppers for each end to keep the door from falling off the track at one end and from running into the wall at the other. Genius!


Thanks for stopping by. Cheerio! (Sorry, I'm allowed one bad pun a week and I had to reach my quota!)

In case you missed it, go here to see how we made the barn door. 

February 6, 2012

Breakfast & Nook Sneak Peek

Progress on the kitchen renovation is coming along (slowly). We aren't 100% done with the breakfast nook yet, but here is a little sneak peek. 

Anyone who knows me will tell you that I am stepping  (WAY) outside my 'neutrals' comfort zone, and I'm a little nervous! Why am I breaking out? I'm trying to create a space that looks as if a young family lives here. I'm also trying to be a new, braver version of myself (remember?) I may panic and change my mind in 2.5 seconds, but I'm trying to wait to pass judgement until it's all done. 


banquette seating, cafe curtains, window treatments, breakfast nook, pillows, kitchen ideas, kitchen, eat-in kitchen, eat in kitchen, bench with table, storage bench in the kitchen, yellow and blue, black chevron pillow, ikat, turquoise, waverly, 


December 21, 2011

Things Are Looking Up

Remember when I first shared this inspiration photo? (see our kitchen inspiration images here)


There is much to love about this kitchen from Southern Living, but the one detail that really sealed the deal for me was that spectacular ceiling. I have been obsessing over bead-board ceilings for a long time now,  so when we started our kitchen renovation (too long ago) I just knew I had to have one. I'll give you all the deets on how we accomplished it in another post, but for now here is the reason all of my guests go home with a kink in their necks. It is the first thing people remark on when they walk into our home. We are so happy with how it turned out - we might even someday forget the pain it caused us to install (but more on that later!)


Here is the before. This is after we moved two walls in the kitchen to open the kitchen up to the dining room. You can see all the holes in the ceiling from where the old walls stood as well as holes from the old lights that were removed when the new can lights went in.


August 31, 2011

Kitchen: The Plan

The other day my eighteen year old niece asked me what I did all day now that I am at home with the baby. I thought about it briefly and then blurted out: I have absolutely no idea.

I thought about it, though, and the truth is: I spend my days trying to keep one very adorable six month old alive...and diapered, and fed, and bathed, and smiling, and clothed, and safe, and entertained, and healthy, and laughing, and on it goes until the crickets start to sing and I fall blissfully into my bed next to a purring orange kitty and a very handsome Diet Coke addict.


This may be the most important thing I ever do and I am desperately trying to enjoy every moment I have with her, memorize every sound she makes, remember every new idea she discovers that makes those blue eyes of hers light up like the stars. She will only be little for so long (not long enough) and I want to be present in every single second of being her mother.

Of course, this means that my house is a wreck, the laundry is chronically dirty, and projects that were started over a year ago still sit where we left them. That is to say, un-done. Incredibly un-done. Remarkably un-done. The un-donest you've ever seen. Un-done-a-doodle.

Which leads me to the kitchen reno. Maybe I should start at the very beginning (a very good place to start...sing with me now!). The plan. Maybe then Mr. and I can get inspired again to get our rear(s) in gear and finish this mammoth of an undertaking.

It's possible to do this and be a parent, right? Other people have successfully raised families while renovating a home. Or so I've been told. Although, people lie. I lie all the time. No I don't. See, I just did.

Sigh. Aren't kitchen renovations the worst? This whole business is making me a little crazy. Or is it? I don't remember.

Without further ado, this is the plan. The method-to-the-incredible-madness plan. There is a lot to be done, so I've written it all down for you. And for me. Sometimes I get a little lost in the details, so it's good to have a plan.

Looking toward the "banquette" area

In no particular order:

1. Install bead board ceiling. 
2. Install new lighting. 
3. Move the refrigerator to the other side of the kitchen to improve the layout and flow of the room. 
4. Of course all the cabinetry will be removed and replaced, but this odd little jaunt will not be coming back. Again, to improve the layout and flow of the room.
5. Install built-in banquette seating. 
6. Install new molding around windows and doors.                                                                 
6a. New window treatments. (why wouldn't I just call this 7? wouldn't that be easier? Is there any limit to my weirdness? and why is weird spelled that way? isn't the rule i before e except after c? I think I need a nap)
7. New wood flooring. (oh sure, name this one 7. that makes sense)

    Looking from the dining room towards the kitchen.
    Looking toward the dining area from the "banquette" area
    8. Remove the walls between the kitchen and dining room.
    9. Move the wall behind the cabinets (there is a closet behind there) one foot back to make room for a dishwasher. 
    10. New wood range hood over the stove.
    11. Replace the glass top stove with a duel-fuel pro style stainless one.


    Looking towards the back door.
     12Remove part of this wall and add a railing.
     13. Repair the drywall from where we removed a closet to expand the bathroom.


    14. Rework the old linen closet into a pantry complete with a barn door.

    Looking from the hallway into the kitchen and dining rooms.


    15.  Install fully integrated dishwasher.


    There, now are you sufficiently confused? Me too. I'm pretty sure a nap will take care of that. Stay tuned for more kitchen madness. This is just the beginning.

    May 11, 2011

    Motivation

    Renovating an entire house has it's ups and downs, periods of frenzied activity where you feel like the projects are practically ticking themselves off the to-do list and periods of sheer laziness where it would take an asteroid colliding with your precious new roof to actually get your rear in gear and repair that gaping hole (or paint that room, or put in that new french door that has been sitting in the garage for a year, or finish that crown molding and base board that you purchased last fall, and on and on.) I think you know what period we are experiencing around here (ahem). And the reason?


    Everything about this tiny little person makes us weak in the knees, from her hilarious laugh which sounds more like a cough, to her crazy little kicks and wiggles when she sleeps. We just can't get enough of her and find ourselves mesmerized by her every sound, which is why she eats into our 'project' time! Not to mention that by the time we FINALLY get her to take a nap (really? you only need a ten minute nap at 10 weeks?) the last thing we want to do is pull out the air compressor and shoot nails into the wall. So, very little has been done around here....until now. We just got the motivation we needed. We found out a few weeks ago that our I-don't-really-think-it-is-necessary-to-sleep-EVER daughter has some pretty severe food allergies. Because I am choosing to continue breastfeeding (I'm stubborn like that) we are now faced with some big changes to our lifestyle. Cutting out dairy, eggs, soy, and meat from your diet means that the eating-out options are slim to none. No more last minute runs to Cafe Rio or Yanni's, no stopping by Cafe Trang for a take-out noodle bowl. Now we spend our time at the grocery store reading every...single...label. Don't get me wrong. I have always loved to cook, but cooking with an infant is no easy task. So we often opted for take-out. Well those days are over. I am now cooking everything from scratch (prepackaged foods often contain dairy, soy or a combination) and am spending more time in the kitchen again. 

    So, we have turned our attention back to the kitchen (again!) Here is the progress so far: 


    The view from the dining room before the walls came tumbling down.


    Same view without the walls


    Sheet rock is finished and bead board goes up on the ceiling (my absolute favorite feature of the new kitchen, but more on that later)


    This is what the kitchen looks like today. We still have a long way to go before we can proclaim it "done" but we are already loving the way it is turning out! Mr. is going to be working on trim this week and then we will paint the cabinets and walls! It's overcast and yucky today, so I'm going to wait until tomorrow to post more pics. These are definitely "in progress" shots, no beautiful "after" photos just yet!

    Until then, have a happy wednesday (or whatever day it is where you're from!)


    September 7, 2010

    It's Electric!

    I realized I am way too deep in the remodeling process when my husband says to me:

     "I need to go pick up some new strippers to finish that three-way," 

    and I respond with 

    "Hold on, I'll grab my purse." 

    Seriously, no smart ass comment from me? Yep we are definitely in the thick of it. Call it wiring tunnel vision. And lest you googled something else and you landed here on accident, let me clarify...

    The new strippers. (I promise that is what they're called!) Mr's most used tool at the moment. 

    A handy reference guide we picked up ten years ago on our first project. While it is a tad simplistic, it is good for someone just starting their first electrical wiring project. (They also published one for plumbing that is good too!)

    We still hire an Electrician to do the "big" stuff like connect the main power to the line, but Mr. does most of the running of the wire inside the house. After so many years of doing this (and following the Electrician around like a puppy asking a million questions), he pretty much knows the ropes. He does, though, still reference the above page every time he wires a three-way switch. What is she talking about? A three-way switch is what happens when you have two switches that power one light source. For example, in our kitchen we have switches on either side that will turn on the overhead lights no matter what door you come in. Apparently it's complicated. Thus the book. 

    And speaking of our kitchen, Mr. has been hard at work rewiring the whole house (it's a long story), moving walls, and other general awesomeness.  Here's the progress so far...

    Looking towards the back door. We are widening the doorway and putting in a small railing above the stairs. 
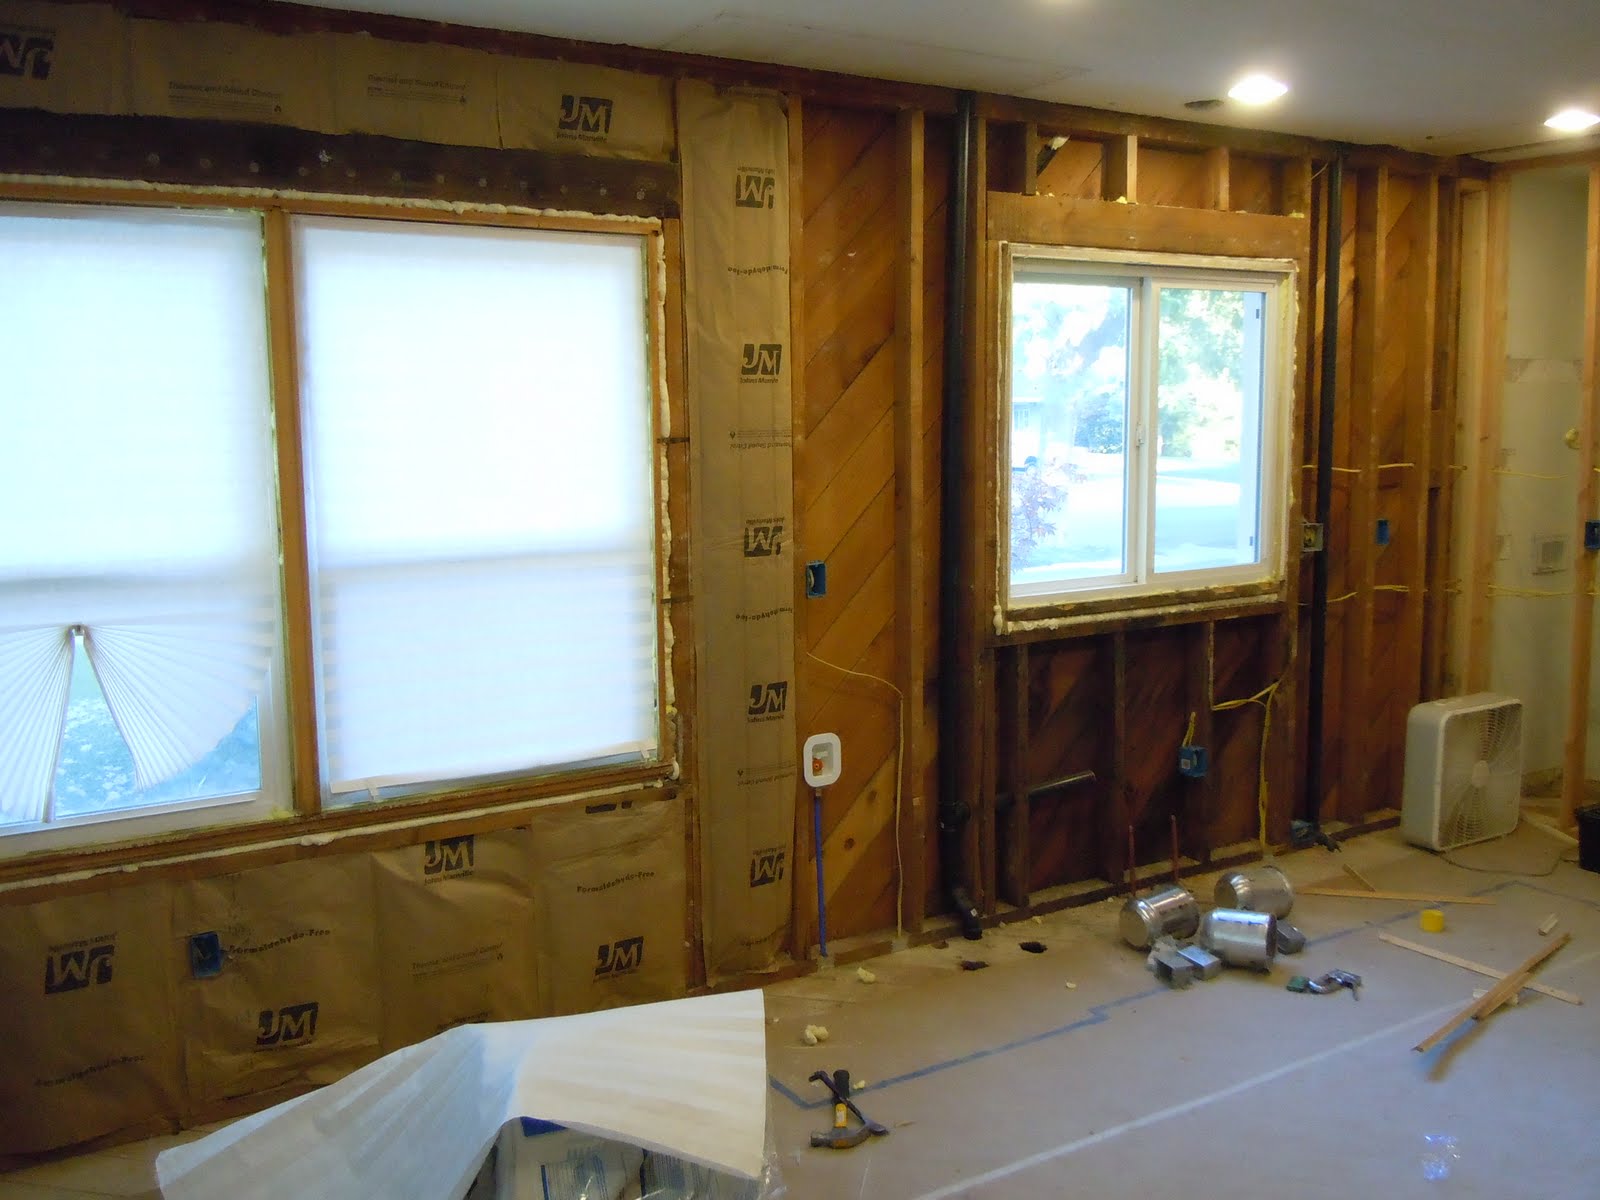
    Mr. removed the old fire-hazard/wiring to make room for the pretty new yellow wiring. Too bad no one will see all his hard work underneath the sheetrock. 

    Looking from the side door into the kitchen towards the sink area. 

    Oh blessed day! While Mr. was in Mississippi on business, the sheetrock crew came in and worked their magic! It is starting to look like an actual room again!

    I know I promised to show you the plan, and I will...one of these days. But for now, here is a sneak peak of what we are working on next....


    Any guesses on what we are doing with the beadboard?

    (For the before shots of the kitchen you can go here. )

    ...

    Related Posts with Thumbnails