Pages

February 9, 2012

How To: Make a Barn Door

During the renovation of our little cottage, we have moved walls, altered the floor plan, and removed doors (among other things), which means we have lots of cast-offs/junk/debris filling the garage. So when it came time to build the new barn door to cover the pantry, we decided to use what we already had on hand (you know we love to do that). 

So we took two of these guys (no idea why there is only one door in this pic. maybe the other one is hiding): 


We ... ok let's be accurate here...the Mr. cut them into pieces and then using a pocket-hole jig he screwed the pieces together and then filled the holes with pocket-hole plugs. **Nate wants you to know that this is not the proper way to build a door. This is the way you build a door when you are trying to use up old doors and you are short on time (or patience...not what he said, that was me) and you just want to build a {insert profanity here} barn door already. If you are curious as to how to properly build a door, well...we'll discuss that later when we show you how he built the cabinets in the dining room. Until then...behold our blunders in door building.**


Here are the plugs in action. I know, it's a beautiful sight.


Then he sanded those bad boys down using an orbital sander. Ooooh! Nice moves.


Then he used a router on the back to make room to insert the v-groove panel. I applauded and then ran inside where it wasn't freezing.


That's the back, that's why all those holes are still exposed. No one will see them when it's installed so no one will remember that they are there. Except you. Forget you saw this picture.


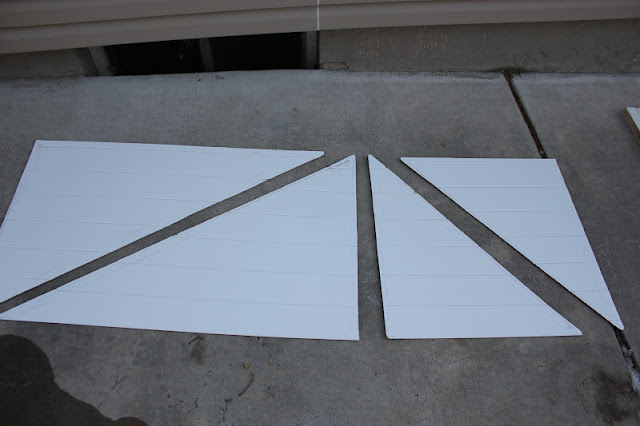
Here is the v-groove panel after it was cut and ready to install in the back of the door. Are you kind of worrying about the water that is inching too close to the paneling? Are you picturing Mr. with his angry face because the paneling is now wet? No? Just me? **Hurry move the paneling!**


H helping her Dad screw holes in the top for the barn door hardware. Such a good helper.


Prime & paint the barn door in Roman Column - the color of all the trim in the house.


Almost there! Now we need a handle...


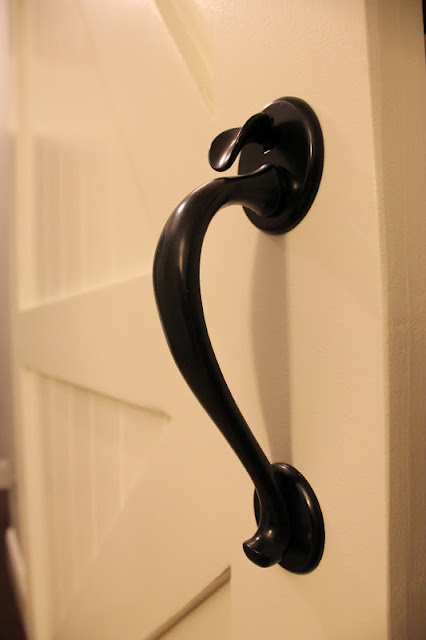
This came off our old front door. It's seen better days. We thought it might clean up nicely.


Alright, maybe a little too nicely. Brass isn't for me. 


With a coat of black satin spray paint. That'll do.

Come back tomorrow for all the glorious after shots. The long-awaiting, we-thought-this-would-never-get-done, holy-moses-it's-a-beauty barn door is up, and we  l - o - v - e it!


February 6, 2012

Breakfast & Nook Sneak Peek

Progress on the kitchen renovation is coming along (slowly). We aren't 100% done with the breakfast nook yet, but here is a little sneak peek. 

Anyone who knows me will tell you that I am stepping  (WAY) outside my 'neutrals' comfort zone, and I'm a little nervous! Why am I breaking out? I'm trying to create a space that looks as if a young family lives here. I'm also trying to be a new, braver version of myself (remember?) I may panic and change my mind in 2.5 seconds, but I'm trying to wait to pass judgement until it's all done. 


banquette seating, cafe curtains, window treatments, breakfast nook, pillows, kitchen ideas, kitchen, eat-in kitchen, eat in kitchen, bench with table, storage bench in the kitchen, yellow and blue, black chevron pillow, ikat, turquoise, waverly, 


February 3, 2012

All I Want Is You


Do you know this song by Barry Louis Polisar? It's a favorite in our house.

I thought I would share this little poster I designed for our hallway gallery project in honor of Valentine's Day coming up. Don't you just love the lyrics? So sweet!

February 2, 2012

Nursery Source List

Our nursery has been featured at Baby Lifestyles! Go here to see the full article, and be sure to check out their site if you are looking for nursery design inspiration.

In the interview, they had asked for sources on where we got our nursery decor items, so I thought I would list them here in case you are curious too.

You can find more pictures of our nursery herehere, and here.


Wall color: Silver Strand by Sherwin Williams

Trim color: Roman Column by Sherwin Williams

Crib: Jenny Lind from here

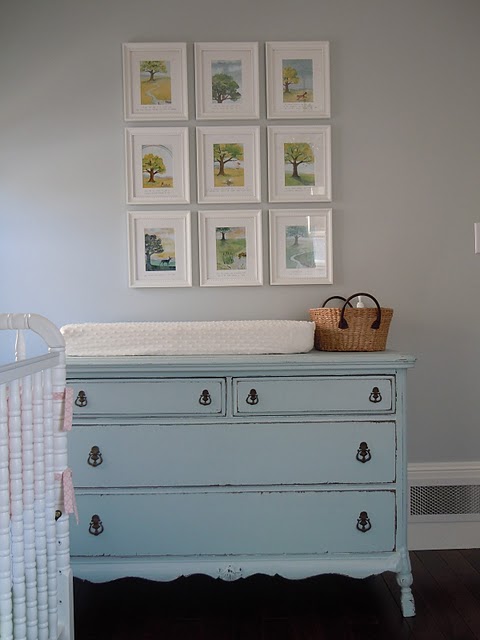
Dresser: Home Again (Salt Lake City)

Frames above dresser: Ikea

Artwork: Original watercolors

Bookshelf: Campo (sadly, no longer in business)

Mirror: Pier One

Rocker/Glider: Pottery Barn

Bedding/Pillows: Made by me with fabric from here.

Bird art above crib: I made the birds with leftover bedding fabric with this pattern. Branch from our backyard.

Lamp: Home Goods. It was originally dark gray, and we spray painted it a glossy white.

Night stand: Antique handed down from my Grandma (H's namesake) and painted by me.

Chandelier: Ballard Designs


February 1, 2012

Project 366: Week 3 & 4

These two weeks are all about H. I know. Big surprise. She's kind of a big deal around here.

 January 15 - Yep, those lips. Everyone comments on them.

 January 16 - H loves her sippy cup.

January 17- the daily Battle Royale: kitty boy vs. pajama clad kid. It usually ends in tears.

January 19- H with Penelope, our favorite piggy.


January 20- On our trip to St. George, we had to stop at the cheese factory in Beaver, Ut for spectacular Jalapeno cheese curds! My mother thinks it odd that my sister and I take pictures of our food. 

January 22- H in a rock.

January 24- Cutting out fabric for the breakfast nook in the kitchen.  (pictures coming soon!)

 January 27- A surprised H crawling down the hallway.

 January 28- Ice cubes in a mesh food holder: the only thing that makes our teething baby happier.

January 29- H helping Nate install the barn door for the pantry.  (pictures coming soon!)

January 31- Sweet little baby feet.

...

Related Posts with Thumbnails